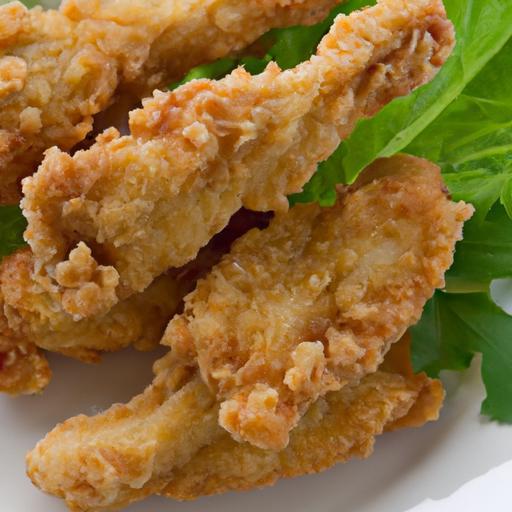
There’s something undeniably satisfying about biting into a perfectly crispy chicken tender-its golden, crunchy exterior giving way to tender, juicy meat inside. Whether served as a nostalgic comfort food or the star of a crowd-pleasing appetizer, homemade chicken tenders have a special place at the table. But achieving that impeccable crunch and flavorful tenderness at home can feel like a culinary challenge. Fear not! In this ultimate guide to crispy homemade chicken tenders,we’ll unravel the secrets,techniques,and tips that transform simple ingredients into an irresistible bite. Get ready to elevate your cooking game and master the art of perfection, one tender at a time.
Choosing the Best Cuts and Marinades for maximum Flavor
Crispy Homemade Chicken Tenders start with selecting the perfect cut to guarantee tender, juicy bites beneath that irresistible golden crunch.Opt for fresh, high-quality chicken tenderloins-the thin strips of meat nestled along the breast-that naturally cook quickly and absorb marinades beautifully.
Marinating is your secret weapon to unlocking deep, savory flavor. A classic marinade combines buttermilk or plain yogurt with a splash of lemon juice, garlic powder, smoked paprika, salt, and pepper. The dairy tenderizes the chicken while infusing moisture, ensuring each tender bursts with flavor. For a bold twist, try a mix with soy sauce, honey, and a pinch of cayenne for balanced sweet-and-spicy notes. Let your chicken rest in the marinade for at least 2 hours-overnight if possible-for maximum impact.
Mastering the Perfect Breading Technique for Extra Crunch
Creating the iconic crispy crust means mastering a reliable breading system. Begin with a three-step dredge: flour, egg wash, and seasoned breadcrumbs. Start by coating each marinated tenderloins lightly in all-purpose flour seasoned with salt, pepper, and a touch of smoked paprika.This helps the egg wash cling.
Next, dip the chicken in a beaten egg mixed with a splash of water or milk, which acts as the glue for the final crunchy layer. press the tenders firmly into a mixture of panko breadcrumbs combined with grated Parmesan and dried herbs like oregano or thyme.Panko’s irregular texture yields an airy crunch far superior to regular breadcrumbs.
For ultra-crispy results, double bread by repeating the egg wash and breadcrumb step.Allowing breaded tenders to rest on a wire rack for 15 minutes before cooking helps set the crust and prevents sogginess.
Secret Cooking Methods to Achieve Crispy Golden Perfection
To truly master crispy golden perfection, the cooking technique is key. While deep frying is the quickest route, shallow frying in a generous pool of oil heated to 350°F (175°C) yields equally excellent results with less mess. Use a neutral oil with a high smoke point such as vegetable or peanut oil.
Carefully lower tenders into hot oil in batches to avoid overcrowding, which causes temperature drops and greasy results. Fry each side for approximately 3-4 minutes until the coating transforms into a rich golden brown.
For a lighter alternative, oven-baking with a light oil spray on the breaded chicken can crisp up the crust beautifully. Preheat your oven to 425°F (220°C) and bake tenders on a parchment-lined tray for 15-20 minutes, flipping halfway through. Finish under the broiler for an extra crunch.
Tips for Serving and Storing Your Homemade Chicken Tenders
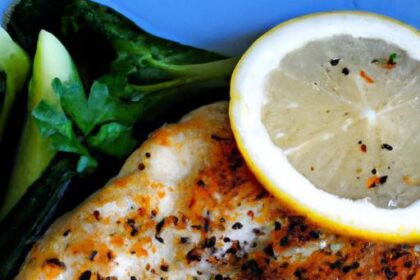
Serve your Crispy Homemade Chicken Tenders piping hot alongside vibrant homemade dips like classic honey mustard, spicy chipotle mayo, or a refreshing cilantro-lime yogurt sauce. Garnish with chopped fresh parsley or a squeeze of lime for a splash of color and brightness.
For make-ahead cooks, cooked tenders keep wonderfully in an airtight container in the fridge for up to 3 days. Reheat in a hot oven or air fryer to revive that crisp crust without drying the meat. Avoid microwaving to prevent soggy breading.
If freezing, flash freeze breaded but uncooked tenders on a tray, then transfer to airtight bags. Cook straight from frozen, adding a couple of minutes to the frying or baking time to ensure doneness.
prep and cook Time
- Prep time: 20 minutes (plus marinating time)
- Cook time: 12 minutes (frying) or 20 minutes (baking)
yield
Serves 4, approximately 16 tenders
Difficulty Level
Easy to Medium – suitable for home cooks seeking impressive results
Ingredients
- 1 ½ pounds fresh chicken tenderloins
- 2 cups buttermilk (or plain yogurt for marinade)
- 1 tsp smoked paprika
- 1 tsp garlic powder
- 1 tsp salt
- ½ tsp black pepper
- 1 ¾ cups all-purpose flour, sifted
- 3 large eggs
- ¼ cup milk or water (for egg wash)
- 2 cups panko breadcrumbs
- ½ cup grated Parmesan cheese
- 1 tsp dried oregano
- Vegetable oil for frying
Instructions
- Marinate: Combine buttermilk, smoked paprika, garlic powder, salt, and pepper in a bowl.Submerge chicken tenderloins and refrigerate for at least 2 hours or overnight for best results.
- Prepare breading stations: Place flour in one shallow dish. In a second bowl, whisk eggs and milk together. In a third dish, combine panko, Parmesan, and oregano.
- Dredge chicken: Remove tenders from marinade,shaking off excess. Coat each piece in flour, then dip into egg wash, and finally press firmly into breadcrumb mixture. For extra crunch, repeat egg and breadcrumb step once more.
- Rest: Arrange breaded tenders on a wire rack and let rest for 15 minutes at room temperature to set crust.
- Cook: Heat oil in a deep skillet to 350°F (175°C). Fry tenders in batches, turning once, about 3-4 minutes per side until deep golden brown and cooked through (internal temp 165°F). Drain on paper towels.
- Optional bake: Preheat oven to 425°F (220°C). Arrange tenders on parchment-lined baking tray, spray lightly with oil. Bake 15-20 minutes,flipping halfway,broil 1-2 minutes if desired.
- Serve: Plate hot with favorite dips and garnishes for a mouthwatering finish.
Chef’s Notes
- For gluten-free tenders, substitute all-purpose flour and breadcrumbs with almond flour and gluten-free panko.
- Adding a teaspoon of cornstarch to the flour dredge enhances crispiness.
- If coating tends to fall off, increase resting time before frying and ensure oil is properly heated.
- Leftover breading can be stored in a sealed bag for up to a week for fast future batches.
- Use an instant-read thermometer to test doneness and avoid drying out your chicken.
Serving Suggestions
Present your Crispy Homemade Chicken Tenders on a rustic wooden board with a trio of dipping sauces: tangy honey mustard, smoky BBQ ranch, and cool cucumber tzatziki.Garnish with lemon wedges and fresh herbs like parsley or chives for a vibrant pop.Pair with crunchy celery sticks or a crisp coleslaw to balance textures and flavors.

| Nutrient | Amount per Serving |
|---|---|
| calories | 320 kcal |
| Protein | 35 g |
| Carbohydrates | 15 g |
| Fat | 12 g |
For more crispy chicken inspiration, check out our Crispy Chicken Wings Recipe. Curious about the science of frying? Visit Serious Eats’ frying guide for expert tips and techniques.
Q&A
Q&A: Crispy Homemade Chicken tenders – the Ultimate Guide to Perfection
Q1: What makes homemade chicken tenders different from store-bought or fast-food versions?
A1: Homemade chicken tenders are crafted with fresh ingredients, allowing you to control every element-from the seasoning blend to the coating thickness.Unlike mass-produced varieties, homemade tenders avoid preservatives and artificial additives, resulting in a fresher taste and a crunch that’s uniquely your own.
Q2: How do I achieve that perfect crispy crust without it turning greasy?
A2: The secret lies in the balance of moisture and fat.Pat your chicken dry before breading to help the coating adhere better and prevent sogginess. Use a sturdy breading sequence-typically flour, egg wash, then a seasoned breadcrumb or panko layer. Frying at the right temperature (around 350°F/175°C) ensures the crust crisps up quickly while sealing in juicy tenderness without soaking up excess oil.Q3: Can I bake my chicken tenders instead of frying?
A3: Absolutely! Baking can yield deliciously crispy tenders with less oil, especially if you use panko breadcrumbs and lightly spray them with cooking oil beforehand.Baking at a high temperature (400°F/200°C) on a wire rack promotes crispiness as the hot air circulates all around. While baked tenders may not be quite as crunchy as fried, they are a healthier and easier alternative.
Q4: What types of coatings work best for extra crunch and flavor?
A4: Panko breadcrumbs are the superstar here-they offer light, airy crunch that’s hard to beat. For extra zest, mix in spices like smoked paprika, garlic powder, cayenne, or even Parmesan cheese. Cornflakes or crushed pretzels give a satisfying crunch, while a tempura-style batter delivers a delicate, crisp shell with a different texture profile.
Q5: How long should I marinate or season my chicken before cooking?
A5: For tender, flavorful tenders, marinate for at least 30 minutes-but up to a few hours for deeper flavor infusion. A simple brine (water, salt, and sugar) or buttermilk soak tenderizes the chicken and adds moisture. Alternatively, dry rub your pieces with spices just before breading if you’re short on time. Both methods help build layers of savory goodness.
Q6: What dipping sauces pair best with crispy chicken tenders?
A6: The classic combos never fail-think tangy honey mustard, smoky barbecue, or cool ranch. For a creative twist, try sriracha mayo for heat, a curry yogurt dip for exotic flair, or a sweet chili sauce for balance. The key is to choose sauces that complement the crispy, savory nature of your tenders without overpowering them.
Q7: Any tips for making this recipe kid-friendly?
A7: Kids usually love simple, crunchy textures and mild flavors. Keep the seasoning gentle-think just salt, pepper, and a touch of garlic powder. Serve with fun dipping options like ketchup or creamy ranch. For picky eaters, smaller tender strips and colorful plating can make the meal more inviting.
Q8: How do I store leftover chicken tenders without losing crispiness?
A8: Let your tenders cool entirely and store them uncovered on a wire rack in the fridge for a short time to reduce steam buildup. When ready to enjoy again, reheat in a hot oven or air fryer to revive the crunch. Avoid microwaving, which tends to create soggy crusts.This Q&A brings you closer to mastering chicken tender perfection-crispy, juicy, and bursting with flavor every single time!
Final Thoughts
With each golden, crispy bite of your homemade chicken tenders, you’re not just enjoying a meal-you’re savoring the art of perfection crafted in your own kitchen. Armed with the tips, techniques, and secrets from this ultimate guide, you’re ready to transform simple ingredients into a crunchy, juicy masterpiece that’s sure to impress family and friends alike.so next time the craving strikes, ditch the takeout, roll up your sleeves, and dive into the satisfying world of crispy homemade chicken tenders-where every tender tells a story of flavor, crunch, and culinary love. Happy cooking!