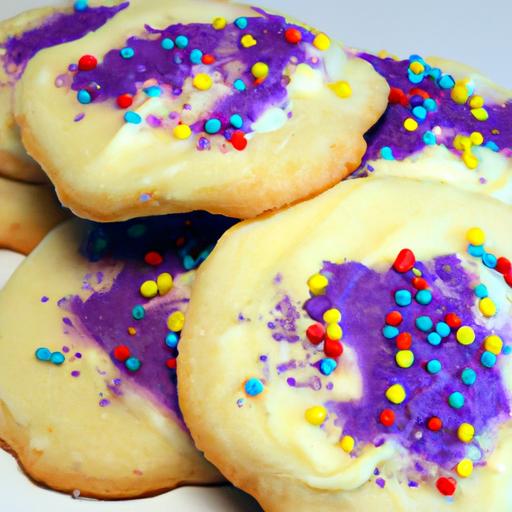


Ther’s something utterly enchanting about biting into a soft sugar cookie crowned with a delicate blanket of royal icing - a bite that marries tender sweetness with artistic elegance. These delightful treats aren’t just cookies; they’re edible canvases where powdery sugar transforms into vibrant, glossy designs that capture the eye and charm the palate. In this article, we’ll explore the magic behind these soft sugar cookies topped with royal icing, uncovering the secrets to their perfect texture, the art of crafting smooth, shimmering icing, and the joy of turning simple ingredients into stunning, mouthwatering masterpieces. Whether you’re a seasoned baker or a curious newcomer, prepare to be inspired by the sweet science and creative flair that make these cookies truly unforgettable.
Delight in Soft sugar Cookies Topped with Royal Icing Magic
Delight in soft sugar cookies topped with royal icing magic offers an irresistible combination of tender, melt-in-your-mouth cookie texture paired with stunning, glossy decorations that catch the eye and spark joy. These cookies, inspired by classic European tea-time confections, have become a favourite for celebrations and heartfelt gifts alike. Whether you’re a beginner baker or a seasoned cookie artist, mastering these techniques will transform your treats into showstoppers that taste just as good as they look.
Prep and cook Time
- Planning: 25 minutes
- Chilling: 1 hour
- Baking: 8-10 minutes
- royal Icing Decoration: 1-2 hours (includes drying time)
Yield
Approximately 24 medium-sized sugar cookies
Difficulty Level
Medium: Ideal for those pleasant with baking basics and eager to hone decorating skills.
Ingredients
- 2 ¾ cups all-purpose flour, sifted
- 1 teaspoon baking powder
- ¼ teaspoon salt
- 1 cup unsalted butter, softened
- 1 ½ cups granulated sugar
- 1 large egg, at room temperature
- 2 teaspoons pure vanilla extract
- 2 tablespoons whole milk
- For Royal Icing:
- 3 cups powdered sugar, sifted
- 2 large egg whites or 4 tablespoons meringue powder + 6 tablespoons water
- 1 teaspoon lemon juice or vanilla extract
- Gel food coloring (optional)
Instructions
- Combine dry ingredients: in a medium bowl, whisk together flour, baking powder, and salt. Set aside.
- Cream the butter and sugar: Using a stand mixer or hand mixer, beat the softened butter and granulated sugar on medium speed until light and fluffy, about 3-4 minutes. This step is key to tender cookies.
- add egg and flavor: Beat in the egg and vanilla extract until fully incorporated.
- Mix in dry ingredients: Gradually add the flour mixture alternated with milk, stirring just until combined. Avoid overmixing to ensure cookies stay soft.
- Chill the dough: Shape the dough into a disk, wrap in plastic, and refrigerate for at least 1 hour. Chilling helps maintain cookie shape and enhances softness.
- Preheat and prepare: Set your oven to 350°F (175°C). Line baking sheets with parchment paper or silicone mats.
- roll and cut: Lightly flour your surface and roll dough to ¼-inch thickness. Use festive cookie cutters for clean, uniform shapes.
- Bake to perfection: Bake cookies for 8-10 minutes, or until the edges just begin to turn golden.The centers should remain pale for the softest texture.
- Cool wholly: Transfer cookies to a wire rack to cool completely before decorating. Warm cookies will cause royal icing to melt and run.
- Prepare royal icing: Beat egg whites or mix meringue powder with water. Gradually add powdered sugar and lemon juice, beating until stiff peaks form. adjust consistency with small amounts of water to achieve desired thickness for outlining and flooding.
- Color and decorate: Divide icing and tint with gel food coloring as desired.Use piping bags fitted with small round tips to outline cookie borders, than flood the interior with thinner icing. Let each layer dry before adding details or multiple colors.
- Dry and store: Allow decorated cookies to dry at room temperature for at least 4 hours or overnight for the royal icing to fully harden.
Tips for Success
- Butter temperature is crucial: Use softened butter, not melted, to achieve the ideal crumb.
- Use gel colors: They won’t thin royal icing like liquid dyes, preserving the perfect consistency.
- Work in layers: Dry between icing colors to prevent colors from bleeding and to build dimension.
- Practice piping on parchment: Before decorating cookies, try out your royal icing techniques on parchment paper to get smooth lines and controlled flow.
- Make ahead: Cookie dough can be frozen for up to 3 months; royal icing can be stored airtight in the fridge for up to a week.
- Troubleshoot wet or dry icing: Add small drops of water or powdered sugar to adjust consistency.
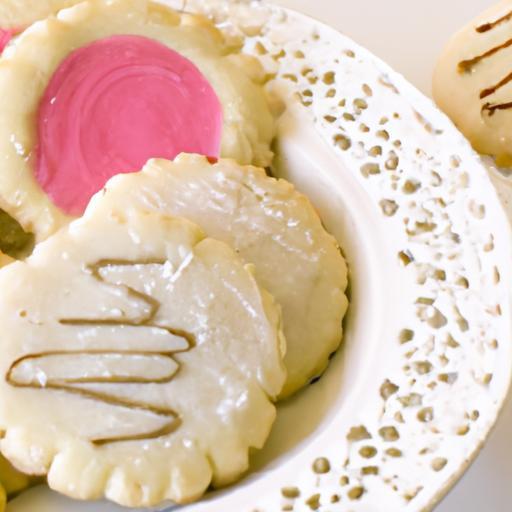
Serving Suggestions
Present these delightful soft sugar cookies arranged on a vintage platter or layered in a lovely tin, perfect for gifting or tea parties. Garnish with a light dusting of edible glitter or finely chopped freeze-dried fruit for extra flair. Pair with a cup of fragrant chamomile tea or chilled sparkling lemonade to highlight the subtle vanilla and buttery notes.
| Nutrient | Per Cookie |
|---|---|
| Calories | 120 |
| Protein | 1g |
| Carbohydrates | 18g |
| Fat | 5g |
For more creative baking inspiration,explore our Easy Homemade Frosting Recipes. For detailed food safety guidelines on using raw egg whites in royal icing,visit the USDA Food Safety and Inspection Service.

Q&A
Q&A: Delight in Soft Sugar Cookies topped with Royal Icing Magic
Q1: What makes soft sugar cookies so special compared to other cookies?
A1: Soft sugar cookies are a tender, melt-in-your-mouth treat that balances sweetness with a delicate crumb. Unlike crunchy or chewy cookies, their plush texture provides a perfect blank canvas for decorating, making each bite both comforting and delightful.
Q2: Why use royal icing to top sugar cookies?
A2: Royal icing is like edible magic-it hardens to a smooth, glossy finish that preserves intricate designs and vibrant colors. Its versatility allows bakers to create anything from simple patterns to elaborate art, turning ordinary sugar cookies into stunning, personalized masterpieces.
Q3: How do you achieve the perfect softness in sugar cookies?
A3: The secret lies in the ingredients and technique: using a good balance of butter, sugar, and flour, ofen with a touch of cornstarch for tenderness, and avoiding overbaking.Chilling the dough before baking also helps maintain a soft, pillowy texture.
Q4: What tips can help beginners decorate sugar cookies with royal icing?
A4: Start with a flood consistency of royal icing-thin enough to spread smoothly, yet thick enough to hold shape. Use piping bags with fine tips for detail, and allow layers to dry completely before adding more.patience and practice turn decorating into delightful art.Q5: Can royal icing be flavored, or is it just sweet?
A5: Absolutely! While customary royal icing is sweet and neutral, you can enhance it with a few drops of vanilla, almond, lemon, or even peppermint extract. Just be cautious not to add too much liquid, as it can affect the drying and consistency.
Q6: How long can decorated sugar cookies stay fresh?
A6: When stored in an airtight container at room temperature, soft sugar cookies with royal icing can stay fresh for about a week. The royal icing acts as a protective glaze, helping to lock in moisture and flavor.
Q7: What occasions are perfect for these royal icing-adorned sugar cookies?
A7: These cookies are wonderfully versatile-ideal for holidays, birthdays, weddings, baby showers, or simply as a sweet gift to brighten someone’s day. Their customizable nature means you can tailor colors and designs to fit any theme or party.
Q8: Is it possible to make these cookies gluten-free or vegan?
A8: Definitely! With a few ingredient swaps-like gluten-free flour blends and plant-based butter-you can maintain that soft texture. Vegan royal icing recipes using aquafaba (chickpea water) instead of egg whites make decorating accessible for all dietary preferences.
Q9: what’s the best way to store leftover royal icing?
A9: Keep royal icing in an airtight container, covered with plastic wrap directly on the surface to prevent drying. Store it in the fridge for up to two weeks. Before using again, stir well and thin with a few drops of water if needed.
Q10: How does decorating sugar cookies with royal icing bring joy beyond taste?
A10: Decorating is a creative journey that transforms baking into an artistic experience.It sparks joy, mindfulness, and connection-whether crafting solo or sharing the fun with friends and family. Each cookie becomes a small canvas of happiness, showcasing personality and love in every stroke of icing.
Wrapping Up
As you savor each tender bite of these soft sugar cookies, lovingly crowned with the delicate artistry of royal icing, you’ll discover that baking is as much about joy as it is indeed about flavor. whether dressed in whimsical patterns or simple swirls of sweetness, these cookies invite you to slow down, indulge, and share a moment of edible magic. So next time you crave a treat that’s both comforting and enchanting, remember: the perfect sugar cookie isn’t just a dessert-it’s a delicious celebration of creativity and heart.