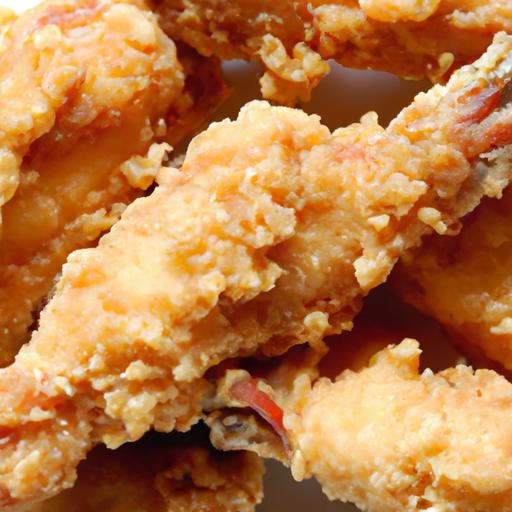
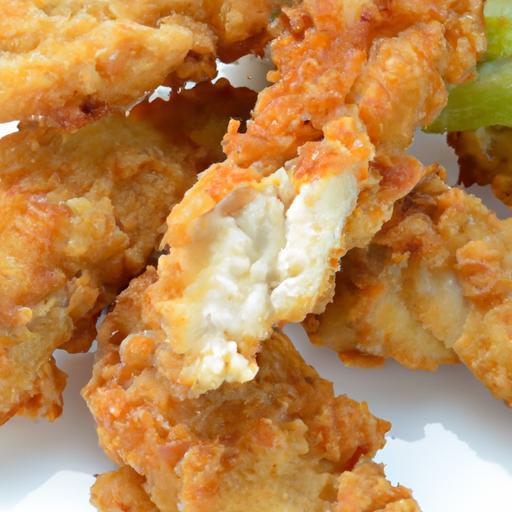
There’s something undeniably satisfying about biting into a golden, crispy chicken tender-its crunchy exterior giving way to tender, juicy meat inside. Whether enjoyed as a quick snack, a family dinner staple, or a crowd-pleasing appetizer, homemade chicken tenders offer a tasty comfort that store-bought versions often can’t match.in this article, we’ll explore how to create perfectly crunchy chicken tenders right in your own kitchen, combining simple ingredients and foolproof techniques to achieve that coveted crispiness and mouthwatering flavor. Get ready to elevate your chicken tender game and bring a new level of crunch to your plate!
Choosing the Ideal Chicken Cuts for Tender Juiciness
Crispy homemade Chicken Tenders start with selecting the perfect chicken cuts to ensure every bite bursts with tenderness and juiciness. While chicken breasts are a classic choice, opting for fresh, high-quality chicken tenderloins – the slim strips of meat nestled under the breast – guarantees a succulent texture that holds up beautifully during frying. These naturally tender strips require less marinating time and fry evenly, giving your tenders that melt-in-the-mouth experience. If you only have chicken breasts on hand, carefully slice them into uniform strips, about ½-inch thick, to mimic tenderloins’ texture and ensure even cooking. Avoid thicker cuts to prevent dryness and uneven cooking.
For the ultimate juiciness, look for chicken labeled “fresh” rather than frozen, as thawed meat can lose moisture. Brining your tenders for at least 30 minutes in a simple saltwater or buttermilk bath also profoundly enhances the juiciness, creating a tender, flavorful foundation before the crispy coating.
Mastering the Crunchy Coating: Breading Techniques and Tips
Achieving that iconic golden crunch takes more than just flour and egg. The secret is layering flavors and textures with a moist-dry process that ensures the coating adheres perfectly and crisps up without sogginess. Start by seasoning your all-purpose flour in the first dredge-add paprika, garlic powder, onion powder, salt, and pepper for a well-rounded base flavor. Next, dip the chicken tenders in a beaten egg wash or buttermilk for an acidic richness that tenderizes while helping the crumbs stick.
The star of the coating is the breadcrumb layer. Use a mix of Panko breadcrumbs for an ultra-crispy, flaky texture combined with finely crushed cornflakes or crushed pretzels to elevate crunch and complexity.Press the breadcrumbs gently onto the tenders – resist the impulse to shake off excess – this ensures each bite delivers maximum crunch. For an extra depth of flavor, mix in finely grated Parmesan and a sprinkle of dried herbs.
Secrets to Perfect Frying: Temperature Control and Oil Selection
The hallmark of crispy homemade chicken tenders is the perfect fry – where a golden crust meets juicy meat. Controlling your frying oil’s temperature is vital; aim for a steady 350°F (175°C). Use a thermometer to monitor, as oil too cool leads to greasy tenders, and oil too hot burns the coating before the inside cooks.
Choosing the right oil is equally essential. Opt for neutral-flavored oils with high smoke points like peanut oil, canola oil, or sunflower oil.These oils allow consistent heat and produce a crisp golden crust without imparting unwanted flavors. Avoid olive oil due to its lower smoke point, which can cause burning.
Fry your tenders in small batches to keep the oil temperature stable and prevent overcrowding. Each tender should bubble gently but steadily when plunged into the oil. Cook for about 4-5 minutes, turning halfway, until the coating is beautifully golden and the internal temperature reaches 165°F (74°C). Drain on a wire rack rather than paper towels to maintain crispness.
Serving suggestions and Dipping Sauces to Elevate Your chicken Tenders
Serve your crunchy chicken tenders on a rustic wooden board or platter lined with parchment paper, garnished with fresh parsley or chives for a pop of color. Pair with crisp celery sticks and a vibrant salad of mixed greens tossed in a light vinaigrette to balance richness.
Elevate every tender bite with an array of dipping sauces. A classic homemade honey mustard sauce – tangy, sweet, and smooth – complements the savory crust perfectly. For a smoky kick, opt for chipotle ranch or a spicy sriracha mayo. Don’t forget a zesty garlic aioli or a cooling blue cheese dip to offer a contrasting flavor and texture.
To create an inviting platter, serve multiple sauces in small ramekins arranged artfully around the tenders.Adding lemon wedges offers a fresh squeeze to brighten flavors, transforming simple chicken tenders into a gourmet finger food experience.
Prep and Cook Time
- Preparation Time: 20 minutes (plus 30 minutes brining time, optional)
- Cook Time: 15 minutes
- Total Time: 35 minutes (excluding brining)
Yield
- Serves 4 (approximately 16 chicken tenders)
Difficulty Level
- easy to Medium
Ingredients
- 1 lb fresh chicken tenderloins (or skinless chicken breasts sliced into strips)
- 1 cup buttermilk (for brining and egg wash)
- 1 teaspoon kosher salt (plus extra for seasoning)
- 1 teaspoon freshly ground black pepper
- 1 cup all-purpose flour, sifted
- 1 teaspoon paprika
- 1 teaspoon garlic powder
- 1 teaspoon onion powder
- 1 large egg
- 1 ½ cups Panko breadcrumbs
- ½ cup finely crushed cornflakes or pretzels
- ¼ cup grated Parmesan cheese
- 1 teaspoon dried Italian herbs (optional)
- vegetable, peanut, or canola oil for frying (about 4 cups)
Instructions
- Brine and Prep: In a bowl, combine buttermilk, 1 teaspoon kosher salt, and ½ teaspoon black pepper. Submerge chicken tenderloins and let sit for 30 minutes in the fridge to tenderize. Remove and pat dry thoroughly with paper towels.
- Season Flour: In a shallow dish, mix flour, paprika, garlic powder, onion powder, and a pinch of salt and pepper. Set aside.
- Prepare Egg Wash: whisk together egg and ¼ cup buttermilk in a separate bowl.
- Breadcrumb Mixture: Combine Panko, crushed cornflakes, Parmesan, and Italian herbs in a third shallow dish.
- Coat the Chicken: dredge each tender in the seasoned flour, shaking off excess. Dip instantly into the egg wash, than press firmly into the breadcrumb mixture, ensuring an even coating. Place coated pieces on a wire rack and repeat.
- Heat Oil: Pour oil into a deep skillet or pot to a depth of about 2 inches. Heat to 350°F (175°C), using a thermometer for accuracy.
- Fry the Tenders: Carefully add tenders in batches, avoiding overcrowding. Fry for 4-5 minutes, turning halfway, until tenders are golden brown and cooked through. Use a slotted spoon to transfer them to a wire rack to drain.
- Rest and Serve: Allow tenders to rest for 5 minutes; this helps the juices redistribute and coating crisp up further. Serve warm with your choice of dipping sauces.
Chef’s Notes
- for a gluten-free option, substitute flour with rice flour and use gluten-free Panko or crushed gluten-free cornflakes.
- If you prefer baking over frying, bake breaded tenders at 425°F (220°C) for 15-20 minutes, flipping halfway, until crisp and cooked.
- To deepen flavor and crunch, double-dip the tenders by repeating the egg wash and breadcrumb step once more.
- Make-ahead: Breaded tenders can be frozen on a baking sheet and stored in a freezer bag for up to 1 month. Fry directly from frozen, adding an extra 2-3 minutes to cooking time.
- Always drain the chicken tenders on a wire rack rather than paper towels to prevent sogginess.
Serving Suggestions
- Present your chicken tenders stacked on a wooden board lined with parchment paper, sprinkled with freshly chopped parsley or chives.
- Accompany with crunchy celery sticks and carrot batons for a refreshing contrast.
- Offer classic or inventive dipping sauces like honey mustard, chipotle ranch, garlic aioli, or a cooling blue cheese dip in ramekins for a vibrant, interactive experience.
- Add lemon wedges around the platter for guests to squeeze,enhancing freshness.
| Nutritional Info (per serving) | Calories | Protein | Carbs | Fat |
|---|---|---|---|---|
| Chicken Tenders (4 pieces) | 380 | 35g | 20g | 18g |
Try this homemade honey mustard sauce to complement your crunchy tenders perfectly. For more on oil selection and frying tips, visit Serious Eats’ Guide to Frying Oils.

Q&A
Q&A: Crispy Homemade Chicken Tenders – A Perfectly Crunchy Delight
Q1: What makes homemade chicken tenders crispier than store-bought versions?
A1: The secret lies in the coating and cooking method! Using a combination of seasoned flour, panko breadcrumbs, and sometimes a hint of cornstarch creates a light, ultra-crunchy crust. Additionally, frying in hot oil or baking with a light spray of oil ensures the tenders crisp up beautifully without becoming greasy.
Q2: Can I bake chicken tenders and still get that irresistible crunch?
A2: Absolutely! Baking can yield seriously crispy chicken tenders when you use panko breadcrumbs and a touch of oil spray. The key is spreading them out on a wire rack over a baking sheet, so heat circulates evenly, crisping every nook and cranny.
Q3: What’s the best way to season the chicken to keep it juicy inside while crispy outside?
A3: Marinating your chicken tenders in buttermilk or a spice-infused yogurt not only tenderizes the meat but imparts flavor and moisture. The acidic dairy helps the coating stick better, making each bite tender and bursting with juiciness beneath the crunchy shell.
Q4: Are there any creative twists to elevate classic chicken tenders?
A4: Definitely! Adding grated Parmesan cheese to the breadcrumb mixture, tossing tenders in spicy buffalo sauce, or serving them with a zesty honey mustard dip can elevate your tenders from classic comfort food to gourmet delight in a snap.
Q5: What dipping sauces pair best with crispy chicken tenders?
A5: The possibilities are endless! Conventional favorites include ranch, barbecue, and honey mustard. For a twist, try garlic aioli, spicy sriracha mayo, or a tangy chipotle lime sauce to complement that crispy crunch.
Q6: How do you avoid overly greasy chicken tenders when frying at home?
A6: Maintaining the oil temperature between 350°F and 375°F is crucial. If the oil is too cool, tenders soak up excess oil; too hot, and they burn outside before cooking through. Using a thermometer and draining cooked tenders on a wire rack with paper towels will keep them perfectly crisp without oiliness.Q7: Can chicken tenders be made healthier without sacrificing crunch?
A7: Yes! Try air frying your tenders with a light mist of oil or baking with whole wheat panko breadcrumbs. Using skinless, lean chicken breasts and swapping heavy coatings for herbs and spices keeps the tenders flavorful and crunchy but lighter.
With these tips and tricks, your crispy homemade chicken tenders will always be the star of the table-a perfectly crunchy delight every time!
Wrapping Up
Whether you’re craving a nostalgic comfort snack or aiming to impress guests with a homemade twist, these crispy chicken tenders deliver a golden, crunchy bite every time.With their perfect balance of juicy tenderness and irresistible crunch, they transform simple ingredients into a culinary delight that’s as satisfying as it is easy to make. So next time hunger strikes,ditch the takeout and bring the irresistible crunch of perfectly crispy homemade chicken tenders right to your kitchen - your taste buds will thank you.