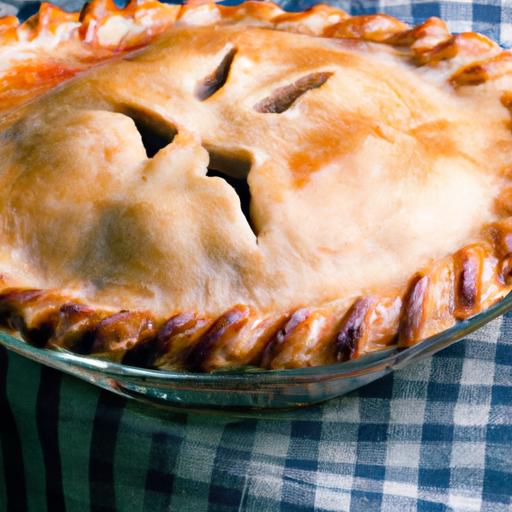


There’s a certain magic in the art of pie-making-a golden, flaky crust that cradles luscious fillings and melts delightfully on the tongue. Yet, behind every perfect pie lies a fundamental technique that frequently enough separates the ordinary from the remarkable: blind baking. Mastering blind baking not only ensures a crisp, bubble-free crust but also elevates your homemade pies from simply good to irresistibly unforgettable. In this article, we’ll unravel the secrets of blind baking, guiding you step-by-step to achieve that flawless pie crust every single time-so you can impress family, friends, and even yourself with a crust that’s pure perfection.
Mastering blind baking is the secret to creating irresistibly flaky pie crusts that hold their shape and texture, elevating every homemade pie to a professional level. This technique, rooted in culinary science, transforms simple dough into a golden, crisp foundation, perfect for both sweet and savory fillings. Whether you’re tackling a classic apple pie or a quiche Lorraine, understanding how to blind bake correctly ensures your crust never falls short.
prep and Cook Time
- Prep time: 20 minutes
- Chill Time: 30 minutes
- Blind Baking Time: 15-20 minutes
- Total Time: Approximately 1 hour
Yield
1 9-inch single pie crust
Difficulty Level
Medium – requires attention to detail but rewarding with practice
Ingredients
- 1 ¼ cups all-purpose flour, sifted for lightness
- ¼ teaspoon fine sea salt
- 1 stick (8 tablespoons) unsalted butter, chilled and cut into ½-inch cubes
- 3-4 tablespoons ice-cold water
- 1 tablespoon granulated sugar (optional, for sweet pies)
- Pie weights or dried beans for blind baking
Instructions
- Prepare the Dough: In a large bowl, combine the flour, salt, and sugar if using. Add the chilled butter cubes. using a pastry cutter or your fingertips, cut the butter into the flour until the mixture resembles coarse peas with some pea-sized chunks remaining-this is key to a flaky texture.
- Add Ice water Gradually: Drizzle in ice-cold water, one tablespoon at a time, gently mixing with a fork until the dough just starts to come together. Avoid overworking; the goal is a shaggy dough that holds when pressed.
- Chill the Dough: Form the dough into a disk, wrap tightly in plastic wrap, and refrigerate for at least 30 minutes. This resting time hydrates the flour and firms the butter, reducing shrinkage during baking.
- Roll Out the Dough: Lightly flour your workspace and roll the chilled dough into a 12-inch circle, about ⅛-inch thick. Transfer carefully into a 9-inch pie pan, easing it without stretching to avoid shrinkage.
- Dock and Chill Again: Using a fork, poke holes evenly across the dough surface to prevent bubbles. Return the crust to the fridge for 15 minutes to firm up once more.
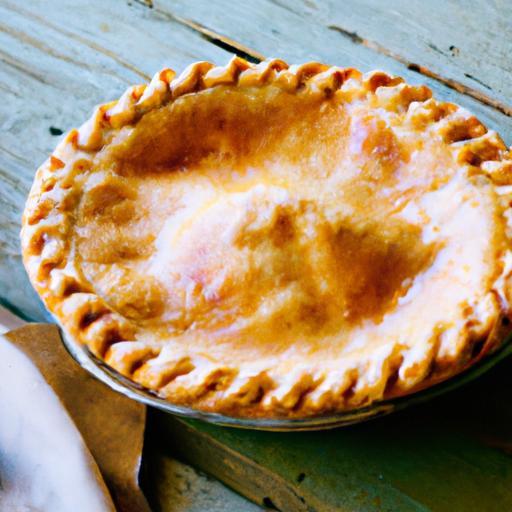
- Blind Bake Setup: Line the crust with parchment paper or foil, ensuring it covers the edges. fill generously with pie weights or dried beans. This weights keep the crust anchored, preventing puffing.
- Bake the Crust: Place in a preheated 375°F (190°C) oven for 15-20 minutes. The edges should start to set but not brown fully yet. Remove weights and lining carefully.
- Finish Baking: Return the crust to the oven for an additional 5-7 minutes, or until the bottom is dry and the edges are lightly golden. This ensures a crisp base ready for your filling.
Tips for Success
- Use cold ingredients-chilled butter and ice water are essential for flakiness.
- Don’t stretch the dough when pressing into the pan; it causes the crust to shrink in the oven.
- Blind baking weights are an excellent investment; alternatively,dried rice or beans work well.
- If your crust edges brown too quickly, shield them with foil strips during the final baking stage.
- For added flavor, mix in a teaspoon of vinegar or lemon juice with the water-this inhibits gluten formation, tenderizing the crust.
- Store unused dough wrapped tightly in the freezer for up to a month, thaw before rolling out.
Serving Suggestions
Once blind baked to perfection, this crust provides the ideal canvas for vibrant fillings. Serve classic apple or berry pies topped with a scoop of vanilla bean ice cream. For savory creations such as quiche or pot pies, garnish with fresh herbs like thyme or parsley for a pop of color and aroma. A light dusting of powdered sugar or a sprinkle of coarse sugar on the crust before baking adds delightful sparkle and crunch.

| Nutrient | Per Serving (1/8 crust) |
|---|---|
| Calories | 160 |
| Protein | 2g |
| Carbohydrates | 14g |
| Fat | 10g |
For deeper insights into dough techniques, explore our article on The Ultimate Guide to Pastry Dough. To understand the chemistry behind baking precision, The King Arthur Baking Guide offers excellent resources on perfect crusts and tips.
Q&A
Q&A: Mastering Blind Baking – Perfect Pie Crust Every Time
Q1: What exactly is blind baking, and why should I bother?
A1: blind baking is the art of pre-baking your pie crust before adding the filling. Think of it as giving your crust a head start. This technique ensures a crisp, golden shell that won’t turn soggy once the juicy filling hits it. It’s especially crucial for custard, cream pies, or any recipe with a wet filling.
Q2: How do I blind bake without ending up with a crust that shrinks or bubbles?
A2: The secret is a cool bulletproof combo: chilling and weights. After rolling out your dough and fitting it into the pan, chill the crust for at least 30 minutes-cold fat helps keep the shape. Then, line it with parchment paper or foil and fill it with pie weights (or dried beans/rice). This anchors the dough, preventing bubbles and shrinkage.
Q3: Can I skip chilling the dough before blind baking?
A3: While you can, don’t. Chilling is your crust’s best friend. It firms up the butter, reduces gluten development, and helps maintain that delicate, flaky texture. Skipping this step frequently enough results in a tough, misshapen crust that’s more “oops” than “wow.”
Q4: How long should I blind bake to get that perfect golden crust?
A4: aim for two stages of blind baking: first, bake with weights for about 15-20 minutes until the edges start to set. Then, remove the weights and bake for another 5-10 minutes or until the crust turns a lovely golden brown. Always keep an eye-ovens vary, and you want crispy, not burnt.
Q5: What if I don’t have pie weights on hand?
A5: No pie weights? no problem! Dried beans, raw rice, or even lentils make excellent stand-ins. Just be sure to store them separately afterward because once they’ve been baked, they’re not for eating anymore. Alternatively,you can use metal chains specifically made for blind baking-they’re reusable and effective.
Q6: Should I brush my crust with something before or after blind baking?
A6: Yes! Before baking, brush the crust lightly with a beaten egg white or melted butter to create a moisture barrier. this step helps keep your crust crispy by sealing the dough’s surface, especially when dealing with particularly juicy fillings.
Q7: can blind baking be used for every type of pie crust?
A7: mostly,yes! Whether it’s classic butter-based,all-butter,or even gluten-free doughs,blind baking can help. However, some delicate doughs or very flaky crusts need gentle handling, so keep an eye on baking times and temperatures.
Q8: Any insider tips for achieving that bakery-style pie crust at home?
A8: Absolutely! Use cold ingredients, avoid overworking your dough to keep it flaky, and don’t forget to prick the base lightly with a fork before lining it with weights-this allows steam to escape and prevents bubbling. Lastly, always let your crust cool before filling to maintain that perfect crunch.
Mastering blind baking doesn’t have to be mysterious or tricky. With these tips, your pie crust will be the flawless golden throne your fillings deserve-every time! Happy baking!
Closing Remarks
With these tips and tricks tucked into your culinary toolkit, blind baking transforms from a daunting chore into a confident, creative step toward pie perfection. Mastering this technique not only ensures a crisp, flaky crust every time but also opens the door to endless filling possibilities without the fear of sogginess or collapse. So, next time you reach for your rolling pin, remember: the secret to a show-stopping pie lies not just in the filling, but in the art of blind baking-your crust’s moment to shine before the spotlight even hits the oven. Happy baking!