
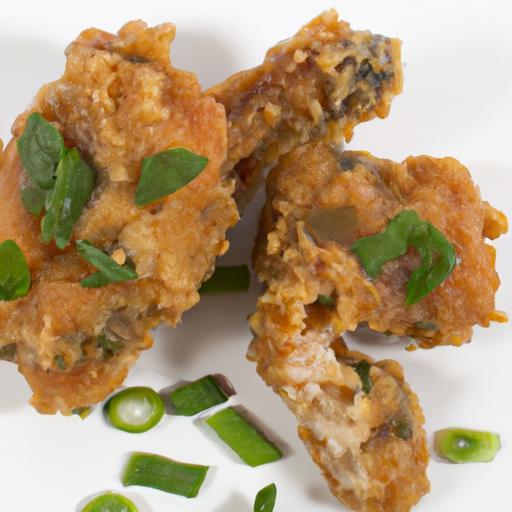
There’s something undeniably magical about biting into a piece of golden, crispy fried chicken-each crunch releasing a burst of savory, juicy perfection. But what if we told you that the secret to elevating this beloved comfort food lies not just in the frying, but in the tenderizing embrace of buttermilk? Welcome to The Ultimate Guide to Crispy Buttermilk Fried Chicken Delight, where tradition meets technique to help you master the art of irresistibly crispy, flavorful chicken right in yoru own kitchen. Whether you’re a seasoned home cook or a curious beginner,this guide will unravel the science,the seasoning secrets,adn the step-by-step methods that transform simple ingredients into a mouthwatering masterpiece. Get ready to embark on a crispy, crunchy journey that will change the way you think about fried chicken forever.
Choosing the Perfect Buttermilk and Spice Blend for Maximum Flavor
The foundation of any unforgettable fried chicken lies in the magic of the buttermilk marinade paired with a thoughtfully crafted spice blend. The buttermilk’s tang and acidity not only tenderize the chicken to juicy perfection but also create the ideal canvas for the spices to deeply infuse. For a truly crave-worthy crust, combine paprika, garlic powder, onion powder, cayenne, kosher salt, black pepper, and a hint of dried thyme or oregano. This balance brings warmth, subtle heat, and aromatic depth while allowing the buttermilk’s creaminess to shine. Marinating overnight or at least 6 hours guarantees that each bite bursts with flavor and tenderness.
Mastering the Art of the Crunchy Coating That Stays Perfectly Crispy
Achieving a crunchy coating that stays perfectly crispy is a culinary art perfected by doing two critical things: layering your dredging process and using the right coating mixture. Begin with a combination of all-purpose flour, cornstarch, and a pinch of baking powder to create lightness and extra crunch. Dip the marinated chicken first in the flour blend, then into an egg wash (or buttermilk for extra moisture), and finally back into the flour mixture-this double dredge locks in moisture and creates an unshakable crust.
For that irresistible crunch, don’t rush drying your dredged pieces-let them rest on a wire rack for 15-20 minutes to set the coating. Avoid stacking pieces to keep airflow consistent, which preserves the crispiness during frying. A dusting of extra spice blend over the flour mix enhances flavor and invites that golden-brown allure every food stylist dreams about.
Secrets to Frying at Just the right Temperature for Golden Perfection
Controlling your oil’s temperature is the ultimate secret to golden perfection. Heat your oil to a steady 350°F (175°C) using a deep-fry thermometer-too hot and the crust burns before the chicken cooks through; too cool and it soaks up oil, becoming greasy and limp. Fry in batches, never overcrowding the pot, to maintain temperature and even cooking.
Each piece usually requires 12 to 15 minutes,depending on size; turn gently halfway for consistent browning. Once removed,transfer the chicken to a wire rack over a baking sheet-not paper towels-to prevent sogginess while letting heat circulate. Completing the fry with a 5-minute rest inside a warm oven at 200°F (93°C) ensures the coating stays crisp and the chicken stays hot for your guests to enjoy instantly.
Serving Suggestions and Storage Tips to Keep Your Chicken Delightful
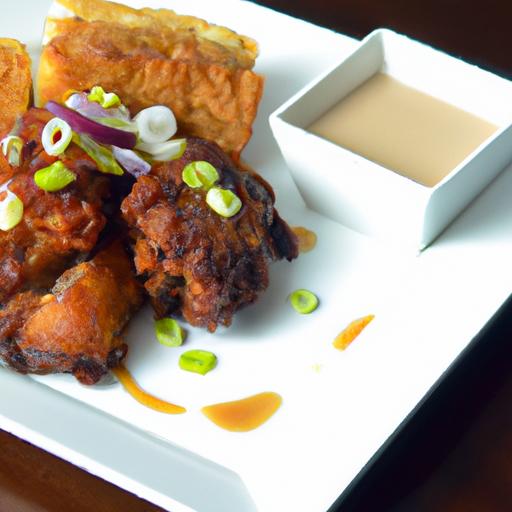
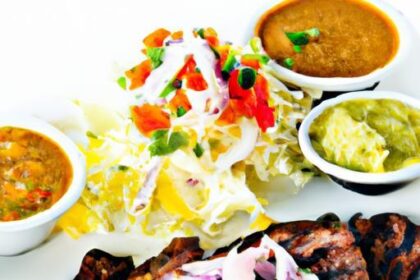
Present your crispy buttermilk fried chicken alongside classic southern sides such as creamy coleslaw, buttery mashed potatoes, or sweet corn on the cob. Garnish with fresh chopped parsley or a squeeze of lemon to add brightness and contrast to the richness. For a delightful experience, serve with homemade honey hot sauce or tangy pickles that cut through the savory crunch.
If you have leftovers-which is rare!-store the chicken in an airtight container in the refrigerator up to 3 days. To revive the crispiness, reheat in a preheated oven at 375°F (190°C) on a wire rack for 10-12 minutes instead of microwaving. This method keeps the crunch intact and warms the chicken evenly, so every bite tastes just as spectacular as freshly fried.
Prep and Cook Time
- Prep Time: 15 minutes + 6-12 hours marinating
- Cook Time: 12-15 minutes per batch
Yield
- Serves 4-6 hungry guests
Difficulty Level
- Medium – a rewarding experience for home cooks ready to master fried chicken
Ingredients
- Chicken: 3 lbs bone-in, skin-on chicken thighs and drumsticks
- Buttermilk Marinade: 2 cups buttermilk, 1 tbsp kosher salt, 1 tsp black pepper
- Spice Blend: 1 tbsp smoked paprika, 2 tsp garlic powder, 2 tsp onion powder, 1 tsp cayenne pepper, 1 tsp dried thyme, 1 tbsp kosher salt, 1 tsp freshly ground black pepper
- Coating: 2 cups all-purpose flour, ½ cup cornstarch, 1 tsp baking powder, remaining spice blend
- Egg Wash: 2 large eggs beaten with ½ cup buttermilk
- Oil for Frying: Vegetable or peanut oil, for frying (about 4 cups)
Instructions
- Marinate: In a large bowl, whisk buttermilk with salt and pepper. Submerge chicken in marinade, cover, and refrigerate for 6-12 hours for deep tenderness.
- Prepare Coating: In a large shallow dish, combine flour, cornstarch, baking powder, and the entire spice blend mix. In a separate bowl, whisk eggs and buttermilk for the egg wash.
- Dredge Chicken: Remove chicken from marinade, shake off excess. Coat each piece first in the flour mixture, then dip in the egg wash, and again in the flour blend. Place coated chicken on a wire rack; let rest 15-20 minutes to set the crust.
- Heat Oil: In a deep, heavy pot or skillet, heat oil to 350°F (175°C). Use a thermometer for accuracy.
- Fry: Fry chicken in batches, avoiding overcrowding. Cook each piece for 12-15 minutes, turning once, until golden brown and internal temperature reads 165°F (74°C).
- drain and Rest: Remove chicken with a slotted spoon to a wire rack set over a baking sheet. after frying all batches, keep chicken warm in a 200°F oven if desired.
- Serve: Plate your crispy fried chicken with your favorite sides. Garnish with chopped parsley or lemon wedges for contrast.
Chef’s Notes
- For extra heat, increase cayenne in the spice blend or add smoked chipotle powder for smoky complexity.
- Substitute coconut milk for buttermilk in the marinade for a dairy-free version-add 1 tbsp lemon juice to mimic acidity.
- To make ahead, marinate chicken overnight and dredge 30 minutes before frying. Keep coated pieces refrigerated on a wire rack.
- If coating feels too thick, lightly spray with cooking oil before frying to encourage crispness and even browning.
Serving Suggestions
- Serve with classic southern sides like creamy coleslaw,honey butter cornbread,and braised greens.
- Complement with a honey mustard dipping sauce or spicy pickles for added zing and texture contrast.
- Garnish with fresh herbs such as parsley, thyme, or chives, and a wedge of lemon for popping freshness.
| nutritional Info (per serving) | Calories | Protein | Carbs | Fat |
|---|---|---|---|---|
| Crispy Buttermilk Fried Chicken | 470 kcal | 35 g | 15 g | 30 g |

Discover more fabulous fried chicken recipes on our Southern Fried Chicken Recipes page. For deeper insight into frying techniques, visit the Serious Eats frying guide.
Q&A
Q&A: The Ultimate Guide to Crispy Buttermilk Fried Chicken Delight
Q1: What makes buttermilk fried chicken so irresistibly crispy?
A1: The magic starts with the buttermilk marinade-a tangy, creamy bath that tenderizes the chicken and infuses it with subtle flavor. This marinade helps the flour coating cling perfectly, creating that signature crunchy, golden crust once fried to perfection. The contrast between the juicy interior and crisp exterior is what hooks taste buds every time.Q2: How long should I marinate my chicken in buttermilk?
A2: For the best results, marinate your chicken for at least 4 hours, but overnight is ideal. This extended soak breaks down proteins in the meat, ensuring every bite is tender and moist.Plus,the flavors penetrate deeply,giving you a richer,more satisfying taste experience.Q3: Can I use regular milk instead of buttermilk?
A3: While you can, buttermilk’s acidity is key to tenderizing the chicken and reacting with the coating to create a crisp crust. If you don’t have buttermilk, mix regular milk with a tablespoon of lemon juice or vinegar and let it sit for 10 minutes-this quick DIY buttermilk will do the trick.
Q4: What’s the secret to the perfect crispy coating?
A4: It’s all about balance! Use a seasoned flour mix with a blend of spices like paprika, garlic powder, and black pepper. Double-dip your chicken-first in the buttermilk, then flour, back to buttermilk, and flour again-to build layers of crunch. Don’t forget to let the coated chicken rest before frying; this helps the crust set and stick better.
Q5: What’s the best oil and temperature for frying?
A5: Choose a neutral oil with a high smoke point-like peanut, canola, or vegetable oil. Heat it to around 350°F (175°C). maintaining consistent oil temperature is crucial: too hot and the crust burns before the inside cooks; too cool and the chicken absorbs excess oil, making it greasy instead of crisp.
Q6: Can I bake buttermilk fried chicken instead of frying?
A6: Absolutely! For a healthier twist, bake the coated chicken on a wire rack at 425°F (220°C). Spritz with oil halfway through baking for that golden crunch. While it won’t be quite as crispy as deep-fried, you’ll still get a delightfully flavorful, crispy bite.
Q7: What sides pair best with crispy buttermilk fried chicken?
A7: Think Southern comfort with a twist: creamy mashed potatoes, tangy coleslaw, buttery cornbread, or a fresh cucumber salad. These sides balance the richness of the chicken and round out a satisfying meal that hits every craving.Q8: How do I keep leftover fried chicken crispy?
A8: Store leftovers in the fridge, then reheat in an oven or air fryer at 350°F (175°C) for 10-15 minutes. avoid microwaving, as it makes the crust soggy. Proper reheating revives the crunch so your chicken delight stays just as spectacular the next day.
Q9: Is buttermilk fried chicken gluten-free?
A9: Conventional recipes use wheat flour, but you can easily substitute gluten-free flour blends or even crushed gluten-free cornflakes to keep the coating crispy without gluten. Just make sure your seasoning and other ingredients are gluten-free, too.
Q10: any final tips for mastering the ultimate buttermilk fried chicken?
A10: Patience is your best friend. Don’t rush marinating or frying. Use a thermometer for perfect oil temperature,and trust the process of double-dipping and resting the chicken before frying.With attention and care, you’ll achieve that breathtakingly crispy, juicy, flavorful chicken that’s truly a delight. Enjoy every crispy bite!
In Summary
As you’ve discovered in this ultimate guide, achieving that irresistible crispy buttermilk fried chicken is both an art and a science-where tender, juicy meat meets a perfectly seasoned, crunchy coating. Whether you’re a seasoned chef or a home-cook adventurer, the secrets shared here will help you transform simple ingredients into a mouthwatering delight that’s sure to impress. so roll up your sleeves, embrace the sizzle, and let every bite transport you to flavorful bliss. Because when it comes to fried chicken, the journey to crisp perfection is just as satisfying as the tasty destination. Happy frying!